
Code Blocks Perfected: Astro and Rehype-pretty-code Tutorial
With Astro, it has never been easier to build efficient, fast, and content-rich sites. It has a built-in markdown reader with a file-based routing system. All we need to do is handle the styling and layout side of things. Though it provides much utility out of the box, customization can be rather tricky.
Today, we’re going to build complex, great-looking code blocks with highlighting, line numbering, and titles.
Initialize Astro project
First, let’s initialize the Astro project.
# create a new project with npm or yarn or pnpm
npm create astro@latest
Then, let’s create our project in the ./pretty-code-blocks directory with an empty preset and, of course, TypeScript support.
Basic setup
We’ll start by creating layout for our markdown file. It will be a simple .astro component with some initial styling.
├── README.md
├── astro.config.mjs
├── package-lock.json
├── package.json
├── public
│   ├── favicon 2.svg
│   └── favicon.svg
├── src
│   ├── env.d.ts
│   ├── layouts
│   │   └── layout.astro
│   └── pages
│       └── index.astro
└── tsconfig.json
Now, let’s write some Astro! This will be a simple HTML page with </slot> tag where the markup will be rendered.
---
// There's no need for props in our case,
// but we could access frontmatter here if we wanted to further customize our layout
// Check: https://docs.astro.build/pl/guides/markdown-content/#frontmatter-layout
---

<html lang="en">
	<head>
		<meta charset="utf-8" />
		<link rel="icon" type="image/svg+xml" href="/favicon.svg" />
		<meta name="viewport" content="width=device-width" />
		<meta name="generator" content={Astro.generator} />
		<title>Astro</title>
	</head>
	<body>
        <div class="content">
           <slot/> <!--  This is where our parsed markdown would be rendered -->
        </div>
	</body>
</html>

<style is:global>
    /* Some initial Styles */
    body {
        width: 100vw;
        height: 100vh;
        background-color: #1c78a6;
        color:white;
    }
    .content {
        max-width: 800px;
        margin: 0 auto;
        font-size: 16px;
        padding: 8rem 0;
    }
</style>
Since we don’t really need our generic landing page, let’s delete pages/index.astro and replace it with index.md. Astro will automatically pick up files in this directory and embed markup files in specified layouts. If you want to avoid putting your content inside the pages directory and dynamically render routes, check out Astro’s content collections↗
---
layout: "../layouts/layout.astro" // route to our layout
---
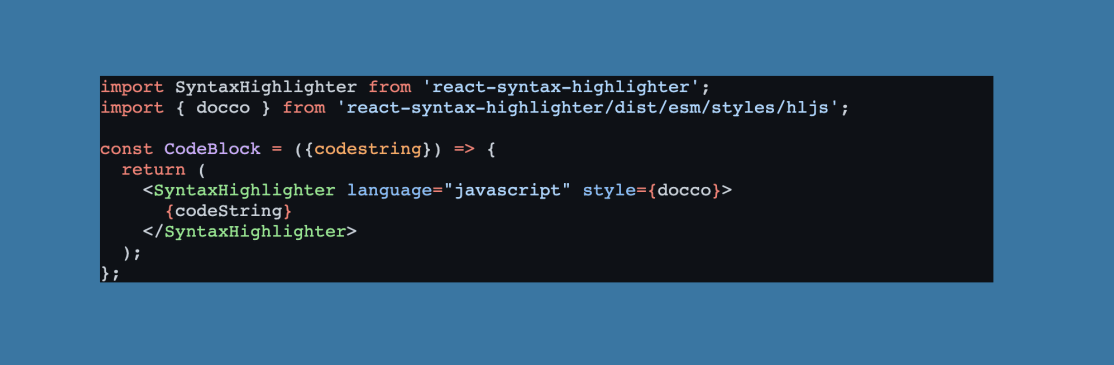
```js title="somethingComponent.ts"
import SyntaxHighlighter from "react-syntax-highlighter";
import { docco } from "react-syntax-highlighter/dist/esm/styles/hljs";
const CodeBlock = ({ codestring }) => {
return (
<SyntaxHighlighter language="javascript" style={docco}>
{codeString}
</SyntaxHighlighter>
);
};
```And that’s it! Our basic configuration is done. Now, let’s run the app from the terminal with npm run dev.
Thanks to Astro’s built-in Shiki, Rehype, and Remark, we’re seeing styled and formatted code blocks. But that’s just the beginning, as we want them to look “pretty”.
Instaling rehype-pretty-code
rehype-pretty-code is a Rehype plugin that provides styling and functionality for parsing code blocks.
Let’s install it using npm:
npm install rehype-pretty-codeNext, let’s set up our plugin inside astro.config.mjs. We’ll provide a basic configuration and hook up a downloaded theme from a .json file (we’ll add line highlighting later). Bear in mind that the configuration can be further extended. To see all the possibilities, visit the rehype-pretty-code GitHub↗.
import { defineConfig } from 'astro/config';
import rehypePrettyCode from "rehype-pretty-code";
import json from "./public/moon_ii.json" assert { type: "json" };


const options = {
  // Specify the theme to use or a custom theme json, in our case
  // it will be a moonlight-II theme from
  // https://github.com/atomiks/moonlight-vscode-theme/blob/master/src/moonlight-ii.json
  theme: json,
};
// https://astro.build/config
export default defineConfig({
    markdown:{
        syntaxHighlight: false, // Disable syntax built-in syntax hightlighting from astro
        rehypePlugins: [
            [rehypePrettyCode, options],
        ],
    },
});
Lets modify the styles a bit to see how much our code block has already changed.
<style is:global>
    body {
        width: 100vw;
        height: 100vh;
        background-color: #1c78a6;
        color:white;
    }
    .content {
        max-width: 800px;
        font-size: 16px;
        margin: 0 auto;
        padding: 8rem 0;
    }
    .content pre > code {
        display: grid; /*  this is way the line will span whole width of `code` component */
        padding: 1.5rem 0;
        background-color: #1E293B;
        border-radius: 0.5rem;
    }
</style>
This is how the code snippet should look like. Now, let’s move on to adding some functionality to it.

Code highlighting
The Markdown is starting to look a bit better. Now, let’s add the code highlighting feature provided by rehype-pretty-code.
import { defineConfig } from 'astro/config';
import rehypePrettyCode from "rehype-pretty-code";
import json from "./public/moon_ii.json" assert { type: "json" };


const options = {
  // Specify the theme to use or a custom theme json, in our case
  // it will be a moonlight-II theme from
  // https://github.com/atomiks/moonlight-vscode-theme/blob/master/src/moonlight-ii.json
  theme: json,
  // Callbacks to customize the output of the nodes
  onVisitLine(node) {
    // Prevent lines from collapsing in `display: grid` mode, and
    // allow empty lines to be copy/pasted
    if (node.children.length === 0) {
      node.children = [{type: 'text', value: ' '}];
    }
  },
  onVisitHighlightedLine(node) {
    // Adding a class to the highlighted line
    node.properties.className.push('highlighted');
  },
};
// https://astro.build/config
export default defineConfig({
    markdown:{
        syntaxHighlight: false,
        rehypePlugins: [
            [rehypePrettyCode, options],
        ],
    },
});
After making this changes we will be able to use meta string {<linestart>-<lineend>,<line>} to highlight any line or range of lines. All That’s left is to style the lines with highlighted class on it and put the metastring on our code block.
<style is:global>
    body {
        width: 100vw;
        height: 100vh;
        background-color: #1c78a6;
        color:white;
    }
    .content {
        max-width: 800px;
        font-size: 16px;
        margin: 0 auto;
        padding: 8rem 0;
    }
    .content pre > code {
        display: grid; /*  this is way the line will span whole width of `code` component */
        padding: 1.5rem 0;
        background-color: #1E293B;
        border-radius: 0.5rem;
    }
    .content pre > code .line {
        border-left: 0.5rem solid transparent;
        padding: 0 0.5rem;
    }
    .content pre > code .highlighted {
        background-color: #2e4c35;
        border-color: #469458;
    }
</style>---
layout: "../layouts/layout.astro" // route to our layout
---
```js title="somethingComponent.ts" {1-2, 5-8}
import SyntaxHighlighter from "react-syntax-highlighter";
import { docco } from "react-syntax-highlighter/dist/esm/styles/hljs";
const CodeBlock = ({ codestring }) => {
return (
<SyntaxHighlighter language="javascript" style={docco}>
{codeString}
</SyntaxHighlighter>
);
};
```We should end up with code block looking exactly like this:

Line numbering
Let’s move on to implementing the line counter feature using the counter CSS property. I’m pretty sure many of you are hearing about it for the first time here. Don’t worry, there are a lot of CSS properties that are not used on a daily basis by most developers.
We’ll implement a counter that will count our span elements with the .line class.
<style is:global>
    body {
        width: 100vw;
        height: 100vh;
        background-color: #1c78a6;
        color:white;
    }
    .content {
        max-width: 800px;
        font-size: 16px;
        margin: 0 auto;
        padding: 8rem 0;
    }
    .content pre > code {
        display: grid; /*  this is way the line will span whole width of `code` component */
        padding: 1.5rem 0;
        background-color: #1E293B;
        border-radius: 0.5rem;
    }
    .content pre > code .line {
        border-left: 0.5rem solid transparent;
        padding: 0 0.5rem;
    }
    .content pre > code .highlighted {
        background-color: #2e4c35;
        border-color: #469458;
    }
    /**
     *  data-line-numbers will be enabled on markdown
     *  with `showLineNumbers` meta string on it
     */
    .content pre > code[data-line-numbers] {
        counter-reset: line;
    }
    .content pre > code[data-line-numbers] > .line::before {
        counter-increment: line;
        content: counter(line);
        display: inline-block;
        margin-right: 2rem
        width: 1rem;
        text-align: left;
        color: #7ca2dfad;
    }
    .content pre > code > .line::before {
        content: "";
        display: inline-block;
        width: 1rem;
        text-align: right;
    }

    /**
     *  we'll need to adjust the space required
     *  the number depending on the number of digits
     */
    .content pre > code[data-line-numbers-max-digits="2"] > .line::before {
        width: 2rem;
    }

    .content code[data-line-numbers-max-digits="3"] > .line::before {
        width: 3rem;
    }
</style>
Line numbering is not enabled by default, to make rehype-pretty-code aware that we want our code block to have line numbers, we need to use showLineNumbers meta string.
---
layout: "../layouts/layout.astro" // route to our layout
---

```js title="somethingComponent.ts" {1-2, 5-8} showLineNumbers
import SyntaxHighlighter from "react-syntax-highlighter";
import { docco } from "react-syntax-highlighter/dist/esm/styles/hljs";
const CodeBlock = ({ codestring }) => {
  return (
    <SyntaxHighlighter language="javascript" style={docco}>
            {codeString}
    </SyntaxHighlighter>
  );
};
```
Right now all of the lines in code block should be numbered.

All that’s left to do is to address the issue of the ugly title on top of the markdown. Let’s handle that next!
Styling markdown’s title
Styling the title will be fairly simple as rehype-pretty-code has us covered here. We just need to target custom attribute that the plugin attaches to the element with our css.
<style is:global>
    body {
        width: 100vw;
        height: 100vh;
        background-color: #1c78a6;
        color:white;
    }
    .content {
        max-width: 800px;
        font-size: 16px;
        margin: 0 auto;
        padding: 8rem 0;
    }
    .content pre > code {
        display: grid; /*  this is way the line will span whole width of `code` component */
        padding: 1.5rem 0;
        background-color: #1E293B;
        border-radius: 0.5rem;
    }
    .content pre > code .line {
        border-left: 0.5rem solid transparent;
        padding: 0 0.5rem;
    }
    .content pre > code .highlighted {
        background-color: #2e4c35;
        border-color: #469458;
    }
    /**
     *  data-line-numbers will be enabled on markdown
     *  with `showLineNumbers` meta string on it
     */
    .content pre > code[data-line-numbers] {
        counter-reset: line;
    }
    .content pre > code[data-line-numbers] > .line::before {
        counter-increment: line;
        content: counter(line);
        display: inline-block;
        margin-right: 2rem
        width: 1rem;
        text-align: left;
        color: #7ca2dfad;
    }
    .content pre > code > .line::before {
        content: "";
        display: inline-block;
        width: 1rem;
        text-align: right;
    }

    /**
     *  we'll need to adjust the space required
     *  the number depending on the number of digits
     */
    .content pre > code[data-line-numbers-max-digits="2"] > .line::before {
        width: 2rem;
    }

    .content code[data-line-numbers-max-digits="3"] > .line::before {
        width: 3rem;
    }

    .content [data-rehype-pretty-code-fragment]{
        position: relative;
    }
    .content [data-rehype-pretty-code-title] {
        position: absolute;
        top:-1.75rem;
        left:0;
        border-top-left-radius: 0.5rem;
        border-top-right-radius: 0.5rem;
        background-color: #1E293B;
        color:#9abcf3ec;
        padding: 0.5rem 1rem;
    }
</style>
Final words

Having a visually appealing Markdown is a crucial element when building your own tech blog, and rehype-pretty-code makes it super simple to implement feature-rich code blocks.
Remember that there are far more features available than the ones I’ve shown in this blog post. Feel free to explore and try out other features for yourself. visiting rehype-pretty-code website↗